The Quiet Work Behind a Community Quilt
Community quilt decisions can preserve many hands in one cloth. Learn how to handle mismatched fabric, pattern disagreements and uneven joins with care.
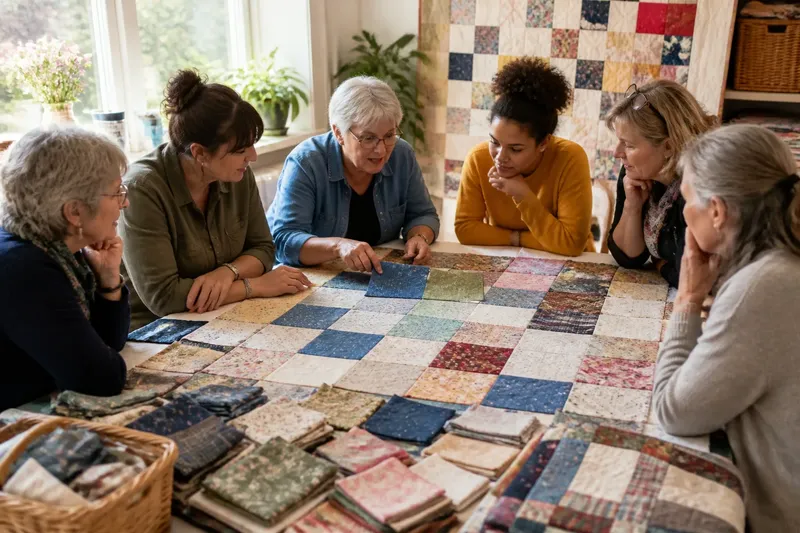
A community quilt can pause on a table while its makers debate whether a blue square belongs beside a faded green one. That small disagreement is part of the work: community quilt decisions about fabric, pattern and joining pieces shape both the cloth and the record it keeps.
Problems often arise not from a lack of skill, but from different people bringing different habits, materials and ideas of what the finished quilt should say. A useful response is to make the decision visible, agree on a way forward and leave room for the cloth to retain evidence of its many makers.
Why do donated fabrics refuse to sit together?
Fabric arrives with its own history and practical limits. A cotton shirt may be soft from wear, while a new quilting cotton holds its shape; a crisp print can dominate a muted piecework remnant. If makers begin cutting before looking at the whole collection, the quilt may feel unsettled or some cloth may prove awkward to handle.
Lay the fabrics out in natural light before assigning them to blocks. Sort first by weight and condition, then by colour and pattern. Hold each piece against its neighbours and notice whether it pulls the eye, disappears, or seems to bridge two unlike areas. These are observations, not rules: a striking contrast may be exactly what the group wants.
Agree which pieces are suitable for the main field, which might work as small accents, and which need to be set aside because their condition makes them difficult to sew. If a fabric has sentimental importance but is too fragile for repeated handling, discuss whether a small, supported section or a written record of its contribution better respects it.
Make a shared fabric map before cutting; label the pieces so that a decision made around the table survives after everyone goes home.
How can a pattern disagreement be resolved?
People may use the same word—simple, traditional, lively—to mean different arrangements. One maker imagines repeated blocks; another wants the pieces to follow no fixed order. The dispute can become personal when an aesthetic preference is mistaken for a judgement about someone’s contribution.
Separate the questions. First decide what the pattern must do: use a particular set of fabrics, leave space for a central motif, or make the joins manageable for the group. Then compare a few paper layouts or fabric mock-ups against those shared aims. A layout can be changed without declaring anyone’s taste wrong.
Imagine a group with patterned squares in several scales and a disagreement over whether to arrange them in rows. They could place paper squares on a table, try a loose rotation, and ask whether each fabric remains visible without crowding its neighbours. The observable result is a layout everyone can inspect and adjust before cloth is cut.
Keep a sketch or photograph of the agreed arrangement, alongside notes on any deliberate variations. The record need not freeze the design; it simply gives makers a common reference when the pieces are later carried to different homes.
What causes blocks to stop lining up?
Uneven blocks may come from different cutting habits, seam allowances or fabric that stretches as it is handled. Even careful makers can produce pieces that do not meet neatly when they are assembled, particularly if the group has not agreed how to measure and press them.
Before a large batch is sewn, settle on a shared seam allowance and a method for pressing seams. A rotary cutter and quilting ruler can help with straight edges, while scissors may be more suitable for shapes that are intentionally irregular. The important point is to choose a common approach that suits the design, rather than expecting every maker to work identically in every detail.
Compare a few sample blocks on a flat surface. If their edges vary, pause and identify whether the difference comes from cutting, stitching or fabric movement. Adjust the shared method before more pieces are made. Where variation is intentional, note it so that the person joining the blocks can plan around it.
Do not disguise every mismatch as a fault. A quilt built from varied hands may carry small differences that belong to its making; the decision is whether they interrupt the design or contribute to it.
Why do joins pucker or pull?
When blocks are joined, the layers and seams can resist one another. A bulky intersection may make a corner difficult to flatten; a stretched edge can leave the finished surface rippled. These effects can also appear when several people assemble pieces using different pressing directions or handling the cloth with different degrees of tension.
Check the back of the work as well as the front. Seams pressed in a consistent direction can reduce bulk in some designs, while alternating directions may help seams meet more neatly in others. Pinning at intersections can hold layers in place, but pins cannot correct an edge that has already stretched or a block that is substantially out of shape.
Try joining a small group of blocks before assembling the full top. If the test section lies flat, note what worked and repeat that method. If it gathers, unpick only the affected join if practical, then examine the seam allowance and the way the fabric was guided beneath the presser foot. A slower, more deliberate pass may help, but the response depends on the particular cloth and design.
How should the group handle recurring questions?
Should every block be the same size?
Uniform blocks simplify a regular grid, while varied sizes can suit a design built around scattered motifs. Choose the arrangement first, then make clear how each piece will connect to its neighbours.
Can unrelated fabrics belong in one quilt?
Yes, if the group gives them a shared visual role, such as a repeated colour, a common border or deliberate contrast. A fabric map can show where each unusual piece will sit before cutting begins.
What if a contributor dislikes the agreed layout?
Ask what specifically concerns them: visibility, balance, symbolism or the treatment of a particular fabric. A small mock-up or alternate placement can address the concern without reopening every decision.
How can makers remember who contributed what?
Keep a simple note of names, fabric descriptions and any stories contributors choose to share. A label on the finished quilt can preserve that record without asking the design itself to carry every detail.
How can the quilt retain the process, not just the pattern?
A shared quilt records more than a final arrangement. It can hold the choices people made together: a repaired edge left visible, a fabric placed where its pattern could be recognised, or a border selected to bring separate blocks into conversation. Such details are not automatic symbols; their meaning comes from what the makers decide to preserve and explain.
Keep brief notes as decisions are made, rather than trying to reconstruct them once the sewing is finished. Record why a material was included, what changed in the layout, and which variations were intentional. Ask contributors before attaching personal names or stories, especially if the quilt will be displayed beyond the group.
When a community quilt begins to snag on a disagreement, return to the cloth and the decision in front of you. A clear fabric map, a shared pattern sketch or one test join can turn an abstract argument into something the group can see and revise. That quiet record of collective making is built one considered choice at a time.